

 Has your shower sprung a leak? If you’re finding mould and mildew, can smell a constant musty or damp odour, or are finding the paint peeling away from the walls, then your shower might be leaking. If left unattended even a small leak can snowball into a much larger problem, so it is essential that you attend to it as soon as possible. Here are some DIY solutions you can employ to fix the different components of your shower.
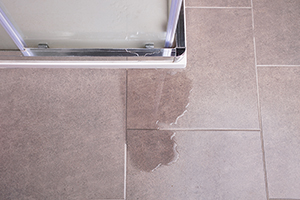
Re-seal the shower tray
Water can leak from your shower tray if it has shifted away from the wall, or the sealant has worn away. You can attempt repairs by using bathroom appropriate masonry sealant or silicone to re-seal the edge of the shower tray. This will seal the gap between the tray and the wall. However, this may not be a permanent fix and you might need a professional to re-fit the tray.
Clean the showerhead
There are two probable causes for your showerhead to be leaking and you can attempt to fix them yourself. The first thing you can do is soak the shower head in white vinegar for a few hours or ideally overnight. This will break down sediment deposits from hard water that have built up in the head. Then clean it thoroughly. You can also check the washers and O-ring to ensure that the seal is still working properly. If you identify problems with these components, the head will need to be removed and disassembled to replace the faulty part.
Re-grout your tiles
The grouting in your bathroom tile is often overlooked but is a key part of keeping moisture from seeping into your walls. As the grout ages it can develop holes and faults through which water can escape. If you’re getting leaks into adjacent walls, then you should consider re-grouting. First, scrape away the old grout and any loose material. Then, use a bathroom sealant to apply fresh grout between your tiles.
Repair your drain leak
If you have access beneath your shower, you might be able to repair a leak in the drain. Once underneath the shower, find the nut that secures the drain. Then tighten it with a spanner or wrench. This is a relatively simple fix that might resolve the issue. If it does not, then you will need more complicated repairs that will require a qualified professional to complete.
Replace the mixer valve cartridge
This can be a simple solution, depending on your shower. First turn off the water supply to your shower. Then remove the valve handle by removing the screws beneath a screw cover on the side of the handle. Next, remove the faceplate and pull off the stop tube if there is one. From here you will be able to remove the existing cartridge by unscrewing it counter-clockwise with water-pump pliers. Then insert the replacement cartridge. Be sure to contact your shower’s manufacturer to make sure you get the right cartridge.
If you still find yourself in need of help with your leaking shower, get in touch with the professionals. At Platinum Plumbers we have years of experience and are ready and able to take all manner of enquiries. Just call 020 8855 0361 or email to contact your local plumbing experts.